Automate Coding in Databricks with Cursor

Recently Cursor has been my new playing field. For those who don't know what Cursor is - it is an AI powered coding editor. And if you haven't tried it until now, you should definitely give it a go.
In this blog, we’ll continue on the journey of AI + productivity and learn why and how to connect your Databricks environment with Cursor.
Why link Databricks with Cursor?
For starters, it's cool (and isn’t that reason enough? 😄). But here are the real benefits:
- Develop faster with Cursor’s AI support + Databricks runtime.
- Write, debug, and optimise Spark/SQL queries on the fly.
- Changes made in Cursor reflect straight into your Databricks repositories.
- Run code against a Databricks cluster without ever leaving your editor.
So let's get to it.
How to Set It Up (5 Simple Steps)
Step 1: Open Cursor
If you don’t already have it, download Cursor and open it up.
Inside Cursor, search for Databricks in the extensions panel. Cursor supports most VS Code extensions.

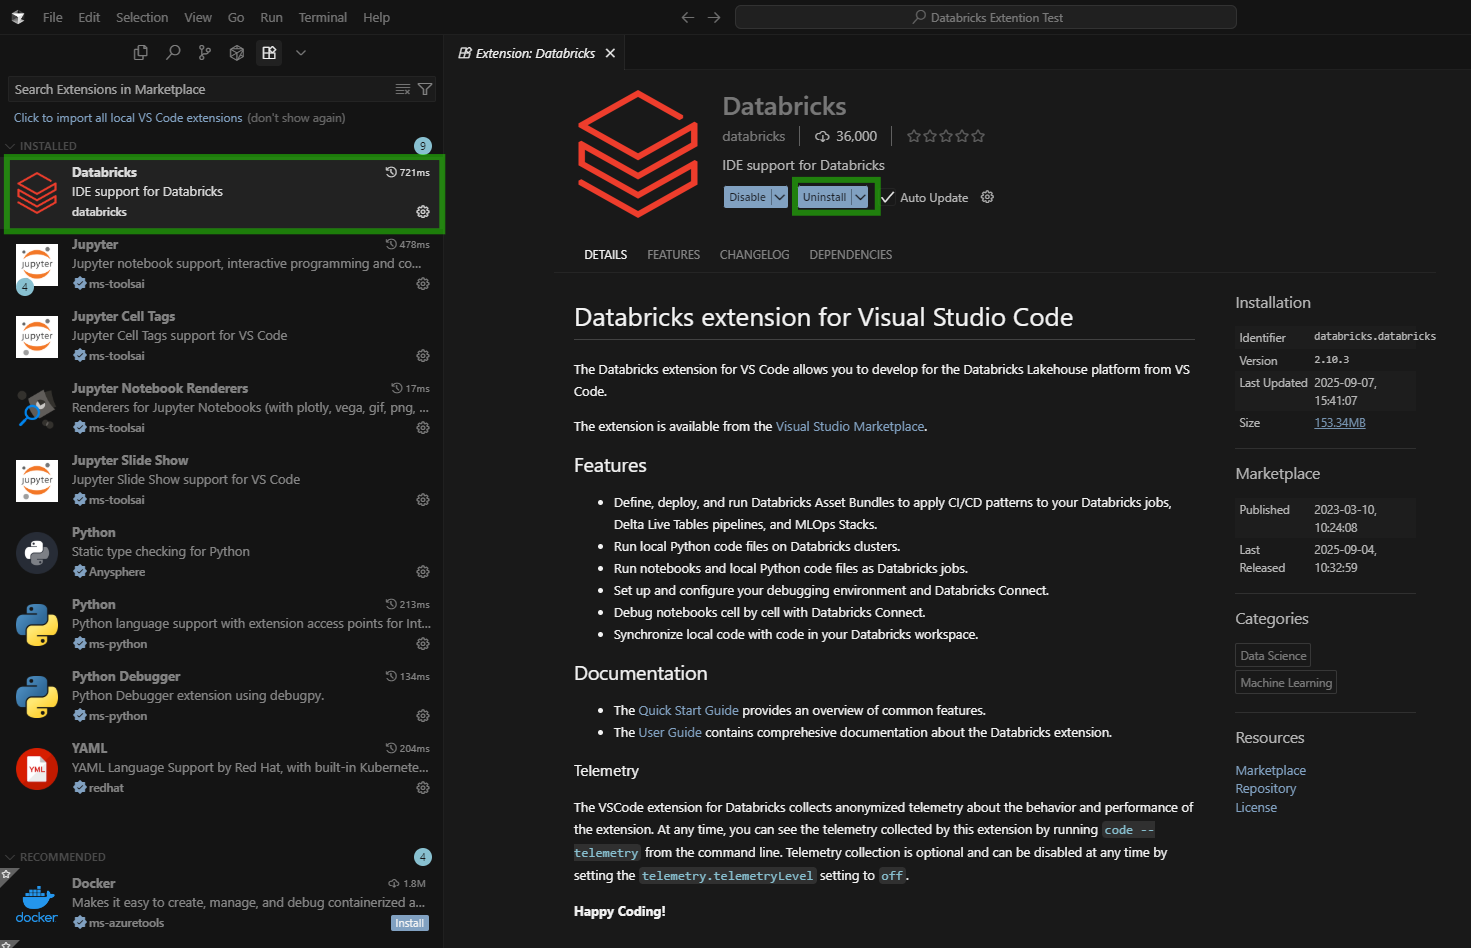
Step 2: Install the Databricks Extension
You’ll see the official Databricks extension. Click Install.
Step 3: Connect Your Databricks Environment
To set up the connection, you’ll need two things from your Databricks account:
- Workspace URL – e.g.,
https://adb-1234567890.12.azuredatabricks.net - Personal Access Token – you can generate this by going to
User Settings → Developer → Access Tokens → Generate New Token.
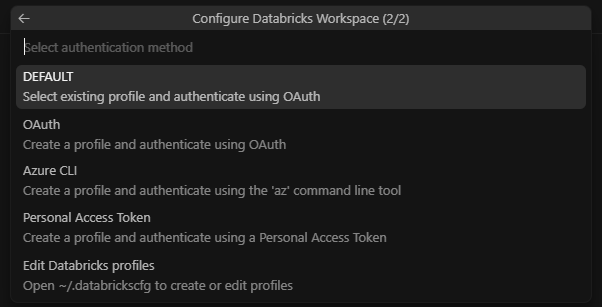
Once you’ve got these, go back to Cursor → Databricks sidebar → click Configure.
Enter your Workspace URL
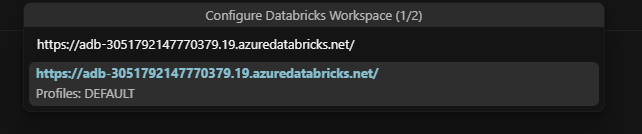
Select Personal Access Token and paste it in.
Step 4: Verify Your Files in Databricks
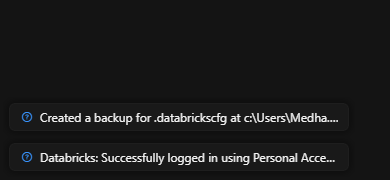
Once you’ve run your first sync from Cursor, head over to your Databricks Workspace.
Navigate to:
Workspace → Users → <your-email> → .bundle → <your-project-name> → dev
Here, you’ll see a folder containing the files you just worked on in Cursor.
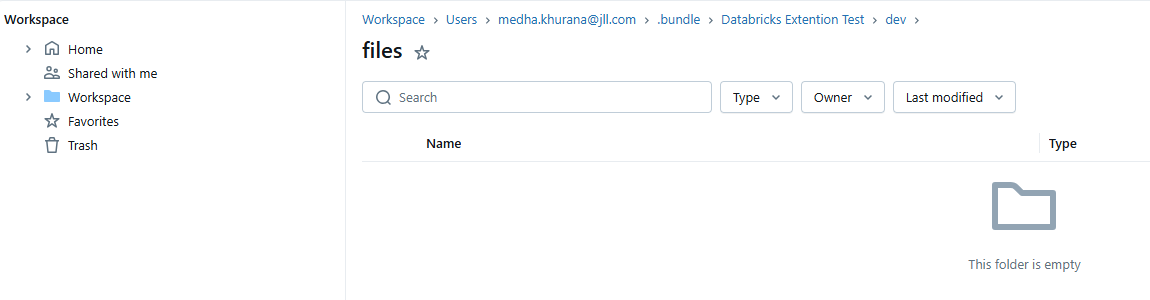
Like in the screenshot above, the folder may be empty at first, but as soon as you start creating or editing files in Cursor, they’ll automatically appear here
This means everything is auto-synced between Cursor and Databricks, and you don’t need to manually upload notebooks or scripts anymore.
Step 5: Run Your Code on a Databricks Cluster
With your files synced, it’s time to actually execute your code on Databricks.
- In Cursor, open the Python file you want to run.
- From the top-right menu, select 'Upload and Run File' (as shown in the screenshot).
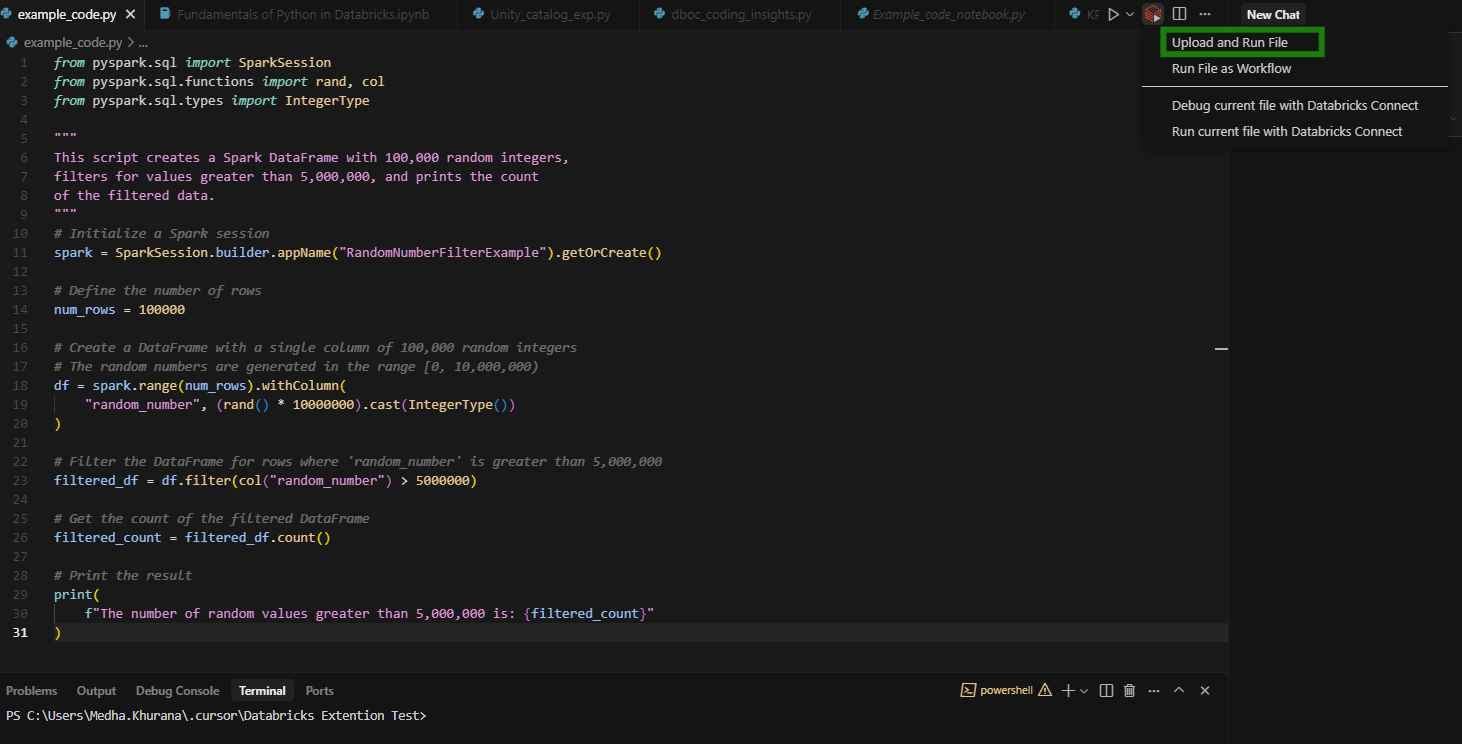
- Once you run the file, you’ll see the results in the Debug Console at the bottom of the Cursor:
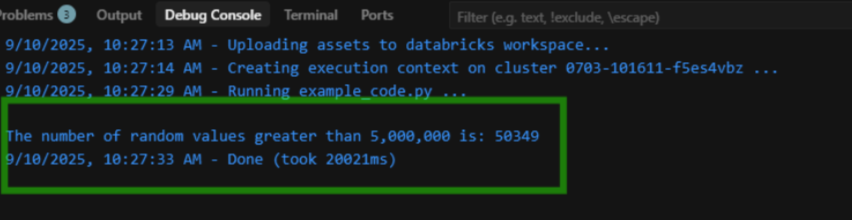
All without ever leaving your coding editor!
BONUS Section:
If you've read/followed this far, below are some other cool functionalities:
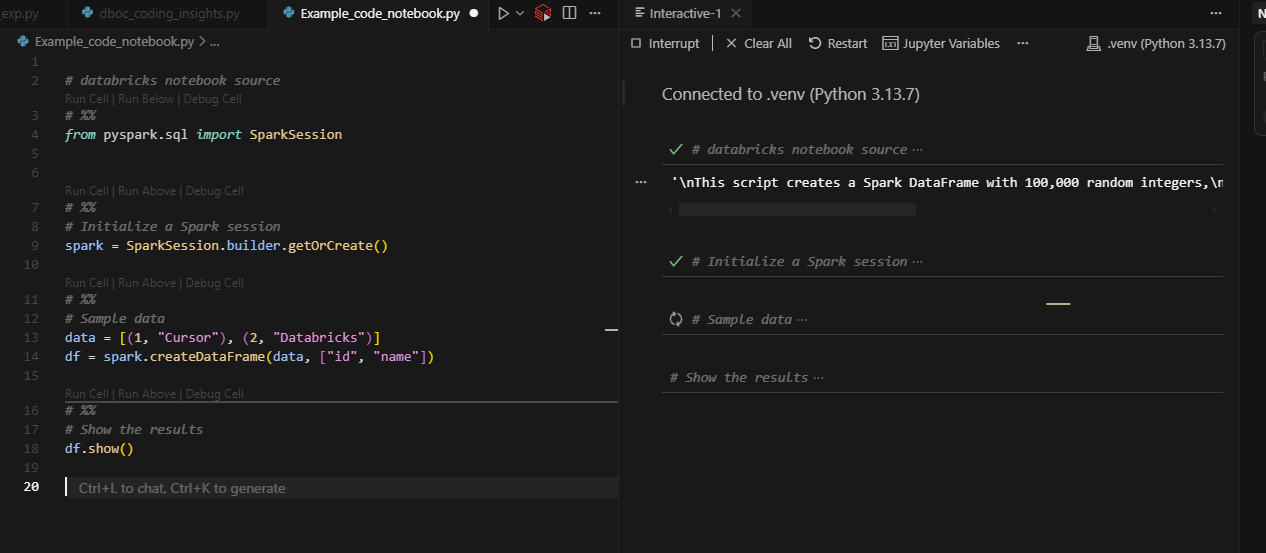
Use the Interactive Window for Notebook-Style Development
One of the coolest things about using Cursor with Databricks is that you don’t have to give up the cell-by-cell notebook experience.
- Split your Python script into cells using the
# %%command.
# %%
from pyspark.sql import SparkSession

# %%
# Initialize a Spark session
spark = SparkSession.builder.getOrCreate()

# %%
# Sample data
data = [(1, "Cursor"), (2, "Databricks")]
df = spark.createDataFrame(data, ["id", "name"])

# %%
# Show the results
df.show()- Run cells with Shift + Enter, and see outputs in the Interactive Window just like a Databricks notebook, but with AI and editor power combined.
Access data in Unity Catalog
You can even explore Unity Catalog directly from Cursor.
This allows you to explore metadata, list tables, and query datasets in a structured manner without ever needing to switch back to the Databricks UI.
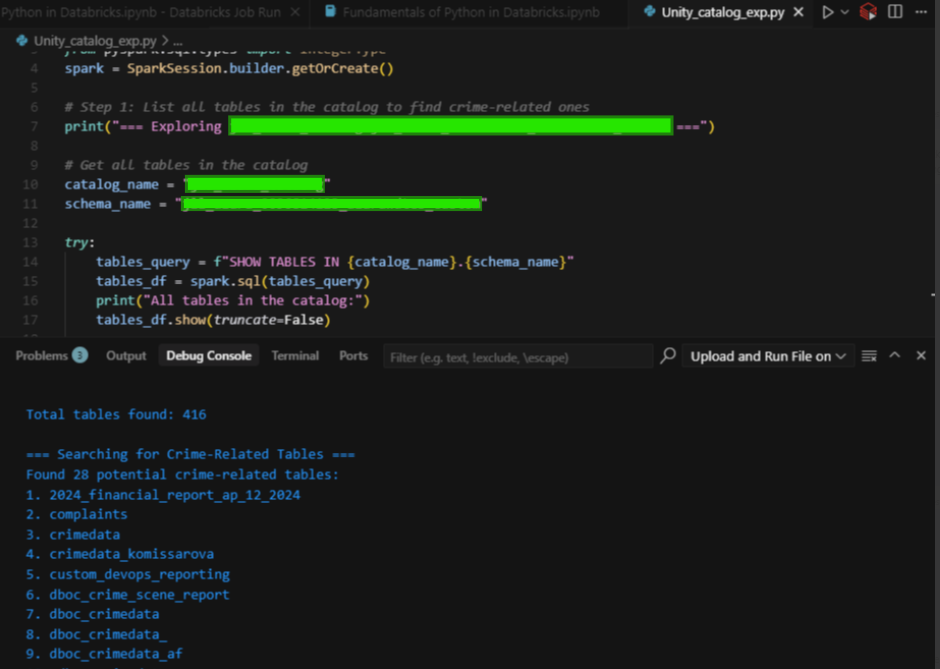
Like in the screenshot above, the code successfully fetched:
- ✅ Total tables found: 416
- ✅ Filtered down to 28 crime-related tables (based on naming patterns)
Closing + What’s Next
That’s the end of the step-by-step guide!
You’ve now gone from installing the extension → logging in with PAT → syncing files → running scripts on clusters → interactive notebook mode → exploring Unity Catalog
By connecting the two, you’ve transformed Cursor from just an AI-powered coding editor into a full-fledged Databricks development environment. This integration isn’t just about saving time (though it does plenty of that!) - it’s about streamlining how you code, test, and collaborate. Once you get used to this setup, it’s hard to imagine going back.
What’s Next?
- Try experimenting with Databricks notebooks directly inside Cursor.
- Set up multiple environments in your
databricks.yml(dev, staging, prod) to mimic real-world deployments. - Explore agentic AI workflows. Cursor’s AI combined with Databricks opens up powerful ways to build, test, and deploy smarter.